Creating a great logo is both an art and a science. Your logo needs to be creative and visually appealing, but also well-structured and properly formatted. It’s a delicate balance. In the past, you would need to hire a professional graphic designer to bring your logo ideas to life. But today, with user-friendly image editing tools like Photoshop, you can create a company logo yourself.
If you’re a small business owner ready to create your own logo, learning how to create a logo in Photoshop can be a game-changer. Adobe Photoshop is one of the most popular image editing software programs on the market, with 33 million paid subscribers around the world. While traditionally used for raster-based image editing, Photoshop offers a robust suite of tools for logo creation that can make your brand shine across digital platforms.
In this step-by-step guide, we’ll cover everything from what makes a great logo to how to bring your vision to life in Photoshop. We’ll also provide you with some alternative options if you decide Photoshop isn’t for you.
- What Makes a Great Logo?
- The Logo Design Process
- Photoshop Logo Design Tutorial
- Using FreeLogoServices to Create Logos

What Makes a Great Logo?
Before we jump into the Photoshop logo design tutorial, it’s important to understand what makes a logo effective. Good logo design is about communicating a brand identity at a glance. For example, if you were creating a logo for a car dealership, you’d incorporate automotive elements such as wheels, gears, or engine parts to convey the service offered to your customers.
With that being said, many logos don’t feature anything related to the company they are used for. For example, McDonald’s golden arches, while iconic, don’t actually communicate to the audience that the company sells hamburgers. There are successful examples of both descriptive and nondescriptive logos; however, a study from the Harvard Business Review found that descriptive logos more favorably impact consumers’ brand perceptions and are more likely to improve brand performance.
Key Elements of Great Logo Design
Whether you decide to create a descriptive or nondescriptive logo, there are a few key elements that you should keep in mind to ensure your logo really stands out.
- Simplicity: The best logos are uncomplicated. A clean, minimalistic logo can be easily recognized and remembered.
- Memorability: A unique shape or element helps a logo stick in the viewer’s mind. Logos that stand out often use clever visual tricks or distinct typefaces.
- Versatility: A logo should look great in various sizes and across different mediums, from business cards to billboards and social media.
- Appropriateness: The logo should match the brand’s tone and target audience. A toy company might use bright colors and playful fonts, while a law firm might go for a more refined, authoritative style.
- Timelessness: Great logos stand the test of time. Avoid following fleeting design trends; instead, opt for a design that will look great years down the line.
Famous Logos & Why They Work
Let’s take a quick look at some well-known logos to see these principles in action.
- Nike: The swoosh is a basic shape that communicates motion and energy—a perfect match for a sports brand. Its simplicity allows for easy recognition and high scalability.
- FedEx: Look closely and you’ll see an arrow formed between the E and the X, subtly emphasizing speed and direction. This hidden element adds depth and cleverness to the logo.
- Amazon: The smile from A to Z suggests customer satisfaction and the wide range of products they offer. The arrow conveys friendliness and completeness.
- McDonald’s: The golden arches are bold, recognizable, and stand out even from a distance. The shape and color make it ideal for outdoor signage and global recognition.
- Apple: The bitten apple is sleek, iconic, and modern, embodying innovation and simplicity. It’s highly adaptable and scalable across products and advertising.
These logos use basic shapes, effective color choices, and distinctive font styles to communicate their brand identity instantly.

The Logo Design Process
Creating a logo involves more than just opening Adobe Photoshop and throwing elements together. A proper logo design process helps ensure your final logo truly represents your brand and meets your professional needs.
1. Research
Understand the brand’s mission, values, target audience, and competitors. Analyze what works and what doesn’t in your industry.
2. Brainstorm
Sketch out rough ideas, jot down keywords, and think about symbols, shapes, and colors that represent your brand. When creating your own logo, try to use a simple pen and paper to draw out your initial ideas. This will help get the logo ideas flowing more freely than digital tools.
3. Digital Mockups
Once you have a rough logo image on paper, use Photoshop to translate sketches into digital designs. Try different styles, layouts, and color combinations. Having a strong logo mockup is crucial to ensuring your design project stays on track.
4. Feedback & Revisions
Share with peers, clients, or test audiences and gather constructive feedback. Refine your design based on this input.
5. Finalization
Ensure your logo is optimized for scalability, clarity, and file format. Export in multiple formats without losing quality.
Photoshop Logo Design Tutorial
Ready to create a logo in Photoshop? Let’s walk through a detailed, step-by-step guide.
Step 1: Set Up Your New Canvas
Open Adobe Photoshop. Go to the Menu Bar and choose File > New. For a versatile logo, start with a square canvas of 1000×1000 pixels or larger. This allows flexibility for resizing later.
Set the resolution to at least 300 pixels/inch for print-quality logos; for web or digital use, 72 pixels/inch is sufficient. Choose RGB color for digital designs or CMYK for print projects. Select a white or transparent background layer, making it easy to place on various colored backgrounds.
Click Create to open your new file.
Step 2: Create Basic Shapes
Photoshop offers a variety of shape tools. Head to the Tools Panel and select the Shape Tool (press U). Use the Rectangle Tool, Ellipse Tool, or Polygon Tool to begin forming your logo shape. In the Options bar at the top, you can modify the fill color, stroke color, and stroke width of your shape. Experiment with different colors and stroke settings to achieve the desired look.
As you create more shapes, keep your Layers panel organized by grouping related shapes together. Select the desired layers and press Ctrl+G (Windows) or Command+G (Mac) to create a group. Remember, the key to creating a strong logo is simplicity. Start with basic shapes and gradually refine them to create a clean and memorable design.
Step 3: Add Text
Click on the Type Tool (T) in the toolbar or press T on your keyboard to activate it. In the Options bar at the top, click on the font dropdown menu and select a font that aligns with your brand identity. Consider the personality and readability of the font. Adjust the font size in the Options bar to ensure your text is proportionate to your logo design. You may need to experiment with different sizes to find the right balance. Click on the color swatch in the Options bar to open the Color Picker. Choose a color that complements your logo shapes and reflects your brand colors.
To create a text layer, click on your canvas where you want to place your text and start typing. Each time you click and type, Photoshop creates a new text layer in the Layers panel. Use the Move Tool (V) to position your text in relation to your logo shapes. You can align the text using the alignment options in the Options bar. Fine-tune the spacing between individual characters by selecting the text layer and adjusting the tracking, kerning, and leading values in the Character panel (Window > Character).
Step 5: Style Your Logo
In the Layers Panel, click on the desired layer to apply effects. Add color gradients using the New Gradient overlay. Double-click a layer to open Layer Styles for shadows, glows, and strokes. Adjust opacity and blend modes to create depth. Use the Group Button or Ctrl+G to group elements for cleaner management. Duplicate elements using Alt+Drag or Ctrl+J for consistency.
Step 6: Align & Adjust
Use the Move Tool (V) to position each layer. Highlight multiple layers and use the Align Buttons (in the Options Bar) to align elements horizontally or vertically. Zoom in for pixel-perfect alignment. Use rulers and guides to ensure balance and symmetry.
Add finishing touches on a New Layer to avoid damaging other layers. Use Free Transform (Ctrl+T) and hold Shift to resize proportionally. Make sure to test your logo against different background colors using a temporary White Box or colored layer.
Step 7: Save Your Logo
Click the file button and then save your project as a PSD for future editing. PSD is the file format that is native to Photoshop. Saving your files in Photoshop format is the best way to preserve the color detail and editable layers.
After saving your PSD file, which is your Photoshop-only format, you can export the design into a widely used format such as PNG or JPG or even PDF if you want it to be printed on a banner, brochure, or business card. For that, be sure to click File > Export > Export As or File > Save a Copy to save it under a different format.
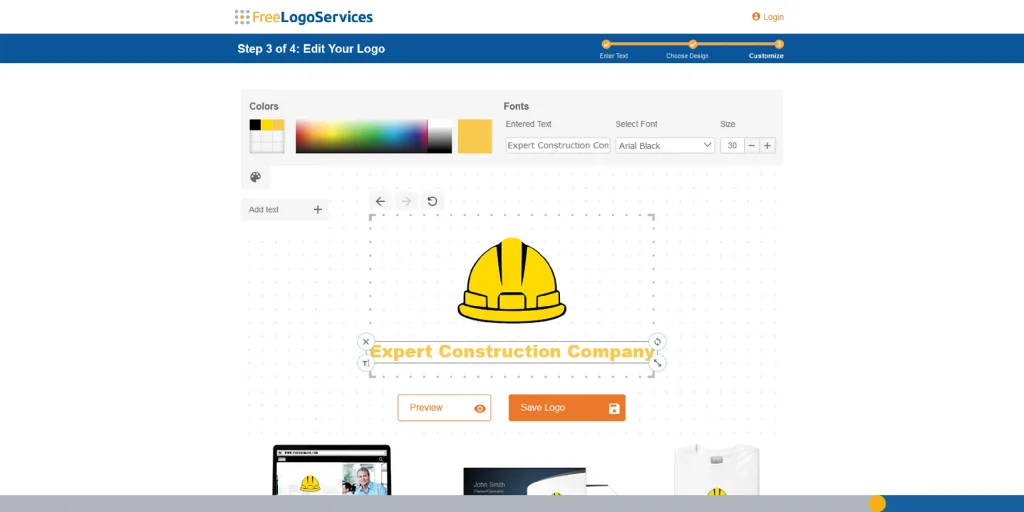
Using FreeLogoServices to Create Logos: A More Streamlined Alternative
Photoshop is a powerful tool that can create some amazing logos. However, the process can be quite difficult for beginners. For those seeking a simpler, more accessible option for crafting a professional logos, FreeLogoServices emerges as a compelling and very easy-to-use alternative to Photoshop.
This user-friendly online platform enables individuals and businesses to create stunning, custom logos without the need for extensive design knowledge or experience.
Harness The Power of AI & Make a Logo That Stands the Test of Time
FreeLogoServices features an intuitive AI-powered interface that is straightforward to use with no graphic design experience necessary. You simply describe the logo idea to FreeLogoServices’ AI assistant, LOGI, and it provides you with various designs that you can choose from. Then customize the image by editing the text and modifying other design elements.
One special feature that you get with FreeLogoServices that you wouldn’t if you create a logo in Photoshop is the ability to work with a professional graphic designer. FreeLogoServices can connect you with a professional designer to help make sure your logo design is just how you like it.
Conclusion
Creating a logo in Photoshop is a fun, rewarding process. With the right tools and techniques, you can design something truly unique that represents your brand with style and clarity. Whether you’re designing for yourself or a client, this guide has you covered. Now, go open that new document and make a logo that stands out!
If working with tools like Adobe Illustrator or Photoshop isn’t for you, maybe you need an easier alternative? FreeLogoServices‘ AI-powered logo maker can help you design a high-quality logo in minutes!
FREQUENTLY ASKED QUESTIONS
Can you create a logo in Photoshop?
Yes, absolutely. While Photoshop is raster-based, it includes many vector tools like the Pen Tool, Shape Tool, Align Tool, Direct Selection Tool, and Text Box Tool that make it a strong choice for logo creation.
What is the best canvas size for logos?
Start with 1000 x 1000 pixels. A square canvas is ideal and scalable. You can adjust it later based on your project needs.
Is Illustrator better than Photoshop for logos?
Illustrator is designed for vector graphics, which is ideal for logos. However, Photoshop offers great flexibility and tools for those more comfortable with its interface.
What file types should I export my logo in?
Always export in PNG (for web), JPG (for general use), and SVG (for scalable vector formats). Keeping a PSD allows for future editing. Creating a scalable logo is one of the most important aspects of the logo design process.
How do I make sure my logo doesn’t lose quality?
When creating a logo in Photoshop, use vector shapes, avoid raster effects, and export at high resolution. Stick with scalable formats like SVG when possible.
What is the difference between raster and vector graphics?
Raster graphics (like JPG or PNG) are pixel-based and can lose quality when scaled. Vector graphics (like SVG or AI) use paths and are scalable without losing clarity.
Can I animate my logo in Photoshop?
Yes! Photoshop offers timeline features for basic animations. However, for more complex logo animations, tools like After Effects are more suitable.
How many versions of a logo should I create?
It’s smart to create multiple versions: full-color, black and white, monochrome, and icon-only. This ensures versatility across different platforms and use cases.
Should I include a tagline in my logo?
You can, but it’s best to create one version with and one without the tagline. This gives you more flexibility depending on the usage.
How do I choose the right font for my logo?
Choose a font that reflects your brand personality. Serif fonts convey tradition and trust, sans-serif fonts are modern and clean, and script fonts suggest elegance or creativity.