You have a business idea, a name, or a product. But if your brand isn’t online, it barely exists. Customers search before they buy. Investors look you up. Even word of mouth leads people to your website before calling.
Building a brand online is about showing up where it matters, appearing credible, and making trust easy. This starts long before your first Instagram post or website launch.
This guide leads you through each step, so you don’t scramble to fix mismatched logos or rebrand months later.
CONTENTS TABLE
- What Building a Brand Online Actually Means
- Step 1: Create a Logo That Works Online
- Step 2: Secure Your Brand Name Online
- Step 3: Build Your Website
- Step 4: Set Up Your Social Profiles
- Step 5: Show Up Consistently (Without Burning Out)
- Common Mistakes When Building an Online Brand
“What started as a means of sorting cattle grew with the industrial revolution to help communicate to consumers which products they should buy. What’s unique? What’s different about this product versus that one? Why is Coca-Cola better than Pepsi? Names, logos, slogans, and mascots were the tools of the trade that got the job done. This era continued for most of the twentieth century.” [1]
Nick Westergaard, Brand Now, 2022.

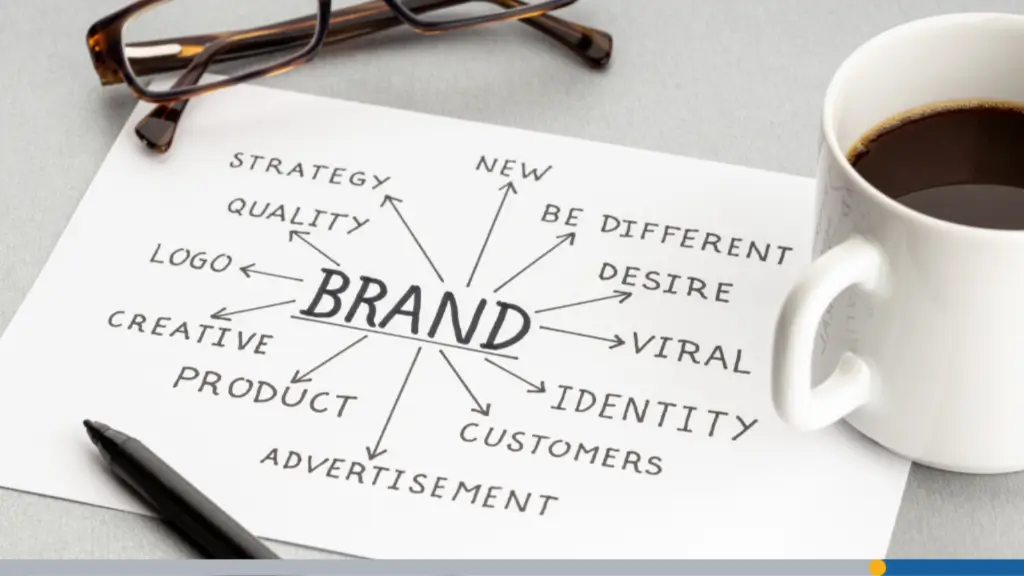
What Building a Brand Online Actually Means
Building your brand online means creating a logo, a website, and social profiles that look consistent and feel trustworthy wherever people find you.
People throw the word brand around a lot. Sometimes they mean a logo. Sometimes they mean a vibe. Often, they’re describing a whole company culture. To build your online presence, let’s get specific.
Online Brand = Visual Identity + Presence + Consistency
Your online brand is three things working together:
- First, there’s your visual identity: your logo, your colors, your fonts, and the overall aesthetic you carry across every platform.
- Second, there’s your presence: the actual places online where you exist, your website, your social profiles, your Google listing.
- Third, and most importantly, there’s consistency: making sure it all feels like it came from the same source.
None of these three elements can carry the brand on its own. A gorgeous logo on a clunky website confuses people. A well-built site with zero social presence limits your reach. And if your Facebook page looks nothing like your website, customers will start wondering if something’s amiss.
Why Your Digital Brand Is Often the First Impression You Make
Think about the last time you heard about a new restaurant, a freelancer, or a local service. Odds are, you looked them up before you did anything else. What you saw in those first few seconds shaped your entire perception. That’s the weight your digital brand carries.
A polished, cohesive online presence signals that you’re serious. It tells people you’ve invested in your business. It makes the difference between someone clicking contact and someone clicking back.
You might want to try FreeLogoServices to improve your logo before putting it on merchandise, as a clean, scalable design can make even low-cost items look more professional.

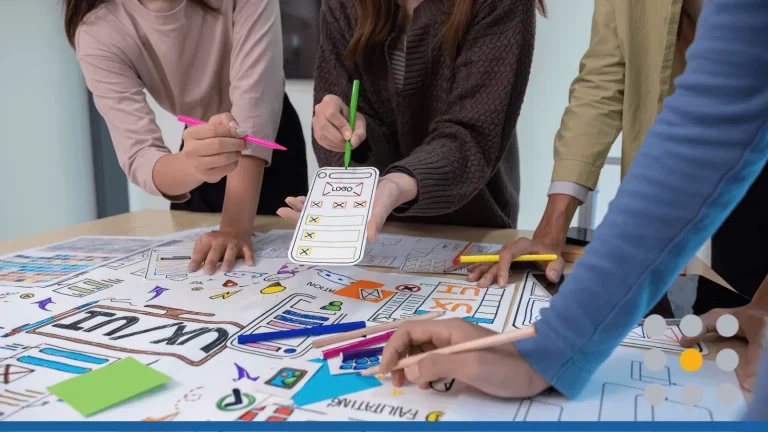
Step 1: Create a Logo That Works Online
Your logo is the anchor of everything else. Before you think about websites or social profiles, you need a logo that actually works in the environments where it’ll live. Online is a different beast than print, and it pays to understand the technical side before you finalize anything.
Formats You Need: PNG for Web, SVG for Scalability
Not all logo files are created equal. For everyday web use:
- A PNG with a transparent background is your workhorse. It renders crisply on most backgrounds and works well at standard display sizes.
- For anything that needs to expand, like a billboard, a banner, or a high-res social header, you want a Scalable Vector Graphic (SVG). That way, you can scale infinitely without losing quality.
When you commission or create your logo, make sure you’re getting both file types from the start. Asking for them later is a headache. Also, grab a JPEG version if your designer offers it; it’s useful for email signatures and certain ad platforms that don’t accept PNG files.
How Your Logo Displays on Websites, Social Profile Photos & Favicons
Your logo will appear in several online contexts, and each has its own requirements. On your website, it often sits in the header at a moderate size. On social platforms, your profile photo is typically square and small, anywhere from 200 X 200 to 400 X 400 pixels. So, if your logo has a lot of text or fine detail, it may not read well at that size.
A favicon is that tiny icon that appears in browser tabs next to your page title. It’s often 32 X 32 or 16 X 16 pixels, which means most full logos won’t work there. Many brands use a simplified mark, like an initial or icon, for their favicon. It’s a small detail, but it adds to the overall polish.
Dark Mode & Transparent Background Versions
Here’s something a lot of new business owners don’t think about until it bites them: dark mode. If your logo is dark-colored and sits on a transparent background, it will disappear on dark-mode websites and apps. You’ll want a light or white version of your logo for those contexts.
Ask your designer for at least three logo versions:
- The primary version.
- A reversed (light) version for dark backgrounds.
- A simplified mark for small-format use.
Getting these three options upfront saves you from scrambling later when your website theme looks perfect, but your logo is invisible. If your logo still needs work, start there first. You’ll save time later when you build your site, set up profile images, and create branded social posts.
Step 2: Secure Your Brand Name Online
Once your logo is locked in, the next step is to secure your name across the web. This is one of those steps people skip until it’s too late, and then they’re stuck with awkward handles or paying a premium for a domain someone else is sitting on.
Domain Name: Matching or Close to Your Brand Name
Your domain is your online home base, and ideally, it matches your brand name exactly. A .com is still the gold standard; people default to typing it. If your exact .com isn’t available, consider a close variation, a hyphenated version, or an alternative extension like .co or .io, especially if you’re in a tech-adjacent space.
Before you fall in love with a business name, check the domain availability. Applications like a domain search tool let you check availability in seconds. While you’re at it, look for a hosting provider that bundles domain registration with reliable web hosting, so everything lives under one roof.
Social Handles: Consistency Across Platforms
You want the same handle (or as close to it as possible) across every platform you plan to use. Consistency makes you easy to find and easy to tag. If @yourbrandname is taken on Instagram, try @yourbrandnamehq or @yourbrandname.co. Whatever you choose, keep it short and memorable.
Use a tool like Namecheckr or Knowem to check handle availability across multiple platforms at once. Even if you don’t plan to be active on every platform right now, claim the handles anyway. It protects you from someone else squatting on your brand name down the road.
Trademark Considerations Before You Invest
This is worth at least a quick mention, even if you’re not planning to file for a trademark right away: Search the USPTO trademark database before you commit to a brand name. If someone else has trademarked a similar name in your industry, you may face a cease-and-desist after you’ve already invested in branding, a website, and marketing.
You don’t need a lawyer to do a preliminary search; the TESS database at USPTO.gov is free and searchable. But if you’re planning to build something substantial, a quick consult with an IP attorney is money well spent. Better to know now than to rebrand everything in year two.
FreeLogoServices provides logo files in various formats, making it easier to meet the requirements of embroidery or engraving vendors that need specific file types.
Step 3: Build Your Website
Your website is your most controlled piece of online real estate. Social platforms change algorithms, shift formats, and occasionally disappear. Your website is yours. It’s where you set the rules, tell your full story, and convert visitors into customers or clients.
What Pages Every Small Brand Website Needs
You don’t need twenty pages to launch. But you do need the right ones. Here’s what every small brand site should include from day one:
- Home: Your value proposition, front and center.
- About: Who you are, why it matters, and what makes you different.
- Services or Products: What you offer and how to get it.
- Contact: A form, an email address, and, ideally, a phone number.
- Privacy Policy: Legally required if you’re collecting any user data.
A blog isn’t required at launch, but it’s worth planning for. Fresh content helps improve search visibility over time and gives you something to share on social media. Even posting once or twice a month soon adds up.
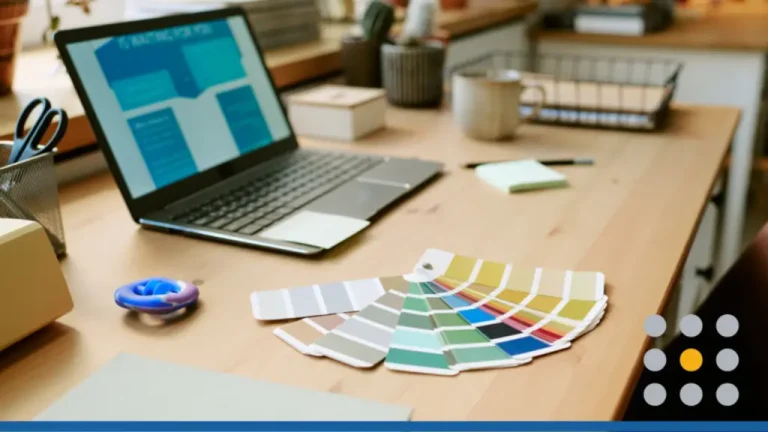
Applying Your Logo, Colors & Fonts Consistently
This is where brands either come together or fall apart. Your website should feel like an extension of your logo, not a separate project. That means using the same color palette, font families, and visual tone you established in your identity work.
Most website builders let you set a global color scheme and typography. Do that first before you start building pages. If your brand uses a warm coral and a clean sans-serif, every button, heading, and link on your site should reflect that. Consistency builds recognition, and recognition builds trust.
DIY Website Builders vs. Hiring a Developer
The honest answer: it depends on your budget, timeline, and how unique your needs are. Platforms like Squarespace, Wix, and WordPress with a managed hosting plan are genuinely solid options for most small brands. They’ve come a long way, and the templates available now are professional-grade.
Hiring a developer makes sense if you have complex functionality requirements (such as a custom booking system or eCommerce with specific integrations), a very tight launch timeline, or a budget that supports it. But if you’re at an early-stage, a well-configured website builder is a smart starting point.
One thing worth checking, regardless of which path you take: Make sure your hosting is reliable. Slow or inconsistent loading times tank your Search Engine Optimization (SEO) and frustrate visitors. Look for providers that offer:
- Solid uptime guarantees.
- SSL certificates.
- Responsive support.
“Spreading resources too thin across multiple platforms can lead to diminished content quality and thus audience engagement. Success in social media marketing comes from understanding the unique characteristics of each platform and creating tailored content that resonates with the specific design and consumption behaviors of the platform.” [2]
Brendan Kane, The Guide to Going Viral, 2025.

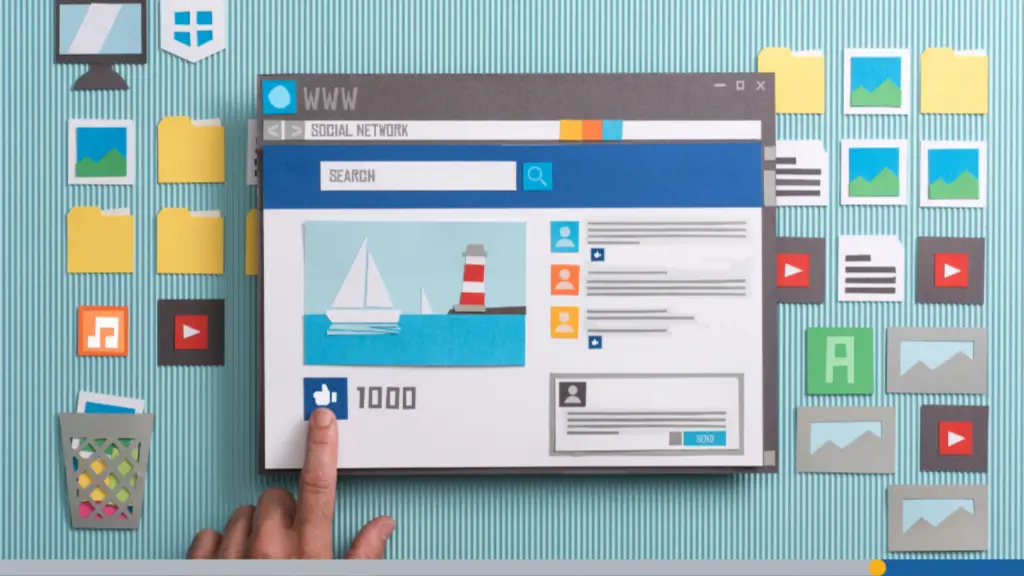
Step 4: Set Up Your Social Profiles
Social media is where your brand gets to show some personality. But before you start thinking about content, you need to set up your profiles properly. A half-finished profile with a blurry logo and a blank bio sends the wrong message entirely.
Choosing the Right Platforms for Your Audience
Don’t try to be everywhere at once. Pick two or three social media platforms where your audience actually spends time and commit to those. Here’s a quick way to think about it:
- B2B brands and consultants: LinkedIn is non-negotiable.
- Product-based businesses: Instagram and Pinterest are strong visual channels.
- Service businesses and local brands: Facebook still drives real local traffic.
- Younger audiences: TikTok and Instagram Reels are where attention lives.
- Tech and creator communities: X (formerly Twitter) still has specialty value.
The point isn’t to write off any platform. It’s to be intentional about where you focus your energy. A well-maintained presence on two platforms, along with useful AI tools, beats a neglected presence on six.
Profile Photo, Cover Image & Bio: Brand Consistency Checklist
Once you’ve chosen your platforms, go through each one and fill it out completely. That means:
- Profile photo: your logo (or a professional headshot if you’re a personal brand).
- Cover image: a branded graphic that reinforces your identity.
- Bio: clear, specific, and with a link to your website.
- Username: consistent with your domain and other handles.
- Contact info: email, phone, or website visible where the platform allows.
The bio is worth spending time on. You have very little space, so make every word count. Lead with what you do and for whom. Secondary detail can be your location, a tagline, or a specific offer. Skip vague phrases like passionate about people and get specific to build a sound brand consistency.
Creating a Content Style That Matches Your Brand Voice
Your visual identity is just half the equation. Your brand voice, how you write captions, respond to comments, and frame your content, is equally important. Are you conversational and warm? Direct and no-frills? Witty and irreverent? Whichever it is, make it deliberate and keep it consistent.
Think about brands you follow and admire. Chances are, you may recognize their content even without seeing the logo. That’s what you’re building toward: a voice so distinct that your audience knows it’s you before they even check the handle.
If you’re wrapping up your brand identity before placing a swag order, FreeLogoServices is a reliable option for creating your logo and getting files ready for production.

Step 5: Show Up Consistently (Without Burning Out)
Consistency is the secret ingredient in brand-building, and it’s also the thing most people struggle with. Life gets busy. Content ideas run dry. Motivation comes and goes. The brands that grow are the ones that have systems in place, so they keep showing up regardless.
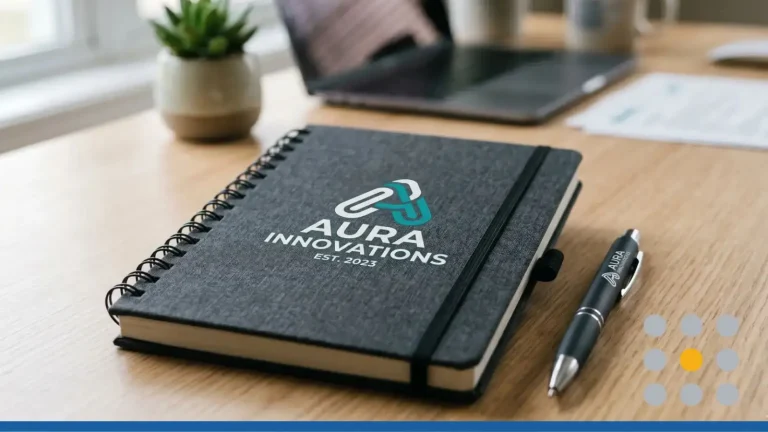
Building a Simple Brand Kit for Social Templates
A brand kit is a cheat sheet for anyone creating content under your brand, including your future self on a busy Tuesday. At a minimum, it should include:
- Your logo files in all versions (primary, reversed, simplified mark).
- Your exact color codes in HEX, RGB, and CMYK.
- Your font names and where to access them (Google Fonts, Adobe Fonts, etc.).
- Examples of on-brand and off-brand imagery.
- A brief description of your brand voice and tone.
Tools like Canva make it easy to create branded templates you (or a team member) can reuse without starting from scratch each time. Set up your brand colors and fonts in Canva once, and every new graphic you create pulls from the same identity.
Content Batching & Scheduling Tools
Here’s a practical tip that makes a huge difference: Batch your content creation. Instead of trying to come up with a post every single day, block out two or three hours once a week to create several pieces of content at once. Then schedule them out using a tool like Buffer, Later, or Hootsuite.
Scheduling tools let you maintain a consistent posting cadence without being glued to your phone. Some platforms, like Meta Business Suite, offer built-in scheduling for Facebook and Instagram. Others have free tiers that work well for small brands getting started.
The specific tool matters less than the habit. Pick one, learn it, and stick with it. Consistency over time is what compounds into real brand recognition.
How to Maintain Visual Consistency as You Expand
As your business develops and more people are involved in creating content, visual consistency can slip. Someone uses the wrong shade of blue. A contractor designs a graphic in a completely different style. These things add up and can make your brand feel disjointed over time.
The solution is documentation. Create a simple brand guide (even a two-page PDF will do) that outlines your visual rules, and share it with anyone creating content for you. Reference it when evaluating new content. Revisit it every six months to make sure it still reflects where the brand is headed.
Common Mistakes When Building an Online Brand
Even when people know what they’re supposed to do, certain mistakes keep happening. Here’s what to watch for so you don’t fall into the same traps everyone else does.
Different Logos on Different Platforms
This one is more common than you’d think:
- A slightly different logo on LinkedIn versus the website.
- An old logo still on the Twitter profile.
- A different variation on the email signature.
Each of the above, on its own, seems minor, but together they create a fragmented identity.
Fix this before you launch anything. Do a full audit of every place your logo appears and make sure it’s the current, correct version. Create a simple checklist:
- Website header.
- Website favicon.
- Email signature.
- Every active social profile.
Website & Social That Feel Like Two Different Brands
You’d be surprised how often this happens. A beautifully designed website in muted blues and clean fonts, and then a social presence that’s loud, colorful, and uses completely different typography. These disconnects confuse people who follow you on social media and then visit your site, or vice versa.
The fix is to build your website and social media assets simultaneously, using the same brand kit. If you’re redesigning one, update the other in the same pass. They should feel like chapters of the same book, not two different stories.
Going Live Before Your Visual Identity Is Locked In
The pressure to launch is real. You want to start building an audience, making sales, and gaining momentum. But launching before your visual identity is finalized means you’ll likely have to rebrand later, which is both costly and confusing to anyone who’s already found you.
Take the extra time upfront:
- Get your logo finalized.
- Choose your colors and fonts.
- Set up your website properly.
Launching a strong, cohesive debut makes a far better first impression than a rushed, half-finished one. You only get one chance to make a first impression.
Ready to lock in your brand identity before your next swag order? FreeLogoServices is a strong place to start when preparing your logo for production. You can also give our AI-Powered logo maker a try.
Frequently Asked Questions
What does building a brand online mean?
It means creating a consistent logo, website, and social presence that people can recognize and trust. If those pieces don’t match, your business can look unfinished or confusing.
Do I need a logo before I build a website?
Yes. Your logo anchors your colors, fonts, and overall look. Building a site without one often means redesigning it once your identity is finalized.
What logo file types do I need for the web?
At minimum: a transparent PNG for general use and an SVG for scalability. Also, get a favicon-sized version (32 X 32 or 16 X 16 pixels) for browser tabs, and a simplified version for profile images.
How do I pick the right social platforms?
Choose based on where your audience is. B2B brands do well on LinkedIn. Visual product brands thrive on Instagram. Local service brands often see strong results on Facebook.
Should my social handles match my domain name?
Yes, as closely as possible. Consistency makes your brand easier to find and builds recognition across channels.
What pages does my website need at launch?
Home, About, Services or Products, Contact, and a Privacy Policy are indispensable. You can add more over time.
How do I stay consistent without burning out?
Build a brand kit, create templates in a tool like Canva, and batch your content in advance. Scheduling tools like Buffer help you stay consistent.
What is a brand kit, and do I need one?
A brand kit documents your logo files, color codes, fonts, and tone guidelines. It’s useful even if you’re a solo operator, and required once you involve others.
When should I trademark my brand name?
Search the trademark database before you launch, and consider filing once your business is generating revenue or when you plan to expand.
What hosting should I use for my new website?
Look for a host with strong uptime, included SSL, and solid customer support. Many small brands do well with managed hosting from providers like HostPapa.
References
- Westergaard, N. 2022. Brand Now: How to Stand Out in a Crowded, Distracted World. First Edition. Nashville, Tennessee: HarperCollins Leadership.
- Kane, B. 2025. The Guide to Going Viral: The Art and Science of Succeeding on Social Media. Austin, Texas: Hook Point LLC.